LULU'S LONG LEAF COAT

LULU'S LONG LEAF COAT

BUFFY'S RED, RED ROMEO & JULIET COAT

BUFFY'S RED, RED ROMEO & JULIET COAT

Sunday, May 30, 2010

Sleeves (and other things)

Dear LuLu, I'm so sorry to hear about your sister. Did you know that I lost both my mother and grandmother to ovarian cancer? The last I inquired, researchers thought that those who inherit this cancer generally contract it in their 30's and early 40's. But at 48, right after Gilda Radner died and the medical community was just learning about inherited ovarian cancer, I had an öophorectomy (ovaries removed) just to be sure. It's a such a difficult disease to detect. Unfortunately, now we don't know whether my daughter is at risk, but she and I agreed it would be silly to take the chance.

While I thought about you and your sister, I cast on the first sleeve. Since this will be a museum piece and the cuffs are K1P1 ribbing, I tried "tubular cast on." What an odd process it is. I was going to try to describe the method here, but there are so many good tutorials on the Internet, my description would be worthless. (I noticed, when I searched, that there are lots of different ways to accomplish the same thing. I used the technique from "The Knitter's Book of Finishing Techniques" by Nancie Wiseman, a very useful little book that's spiral-bound--so it lies flat!)

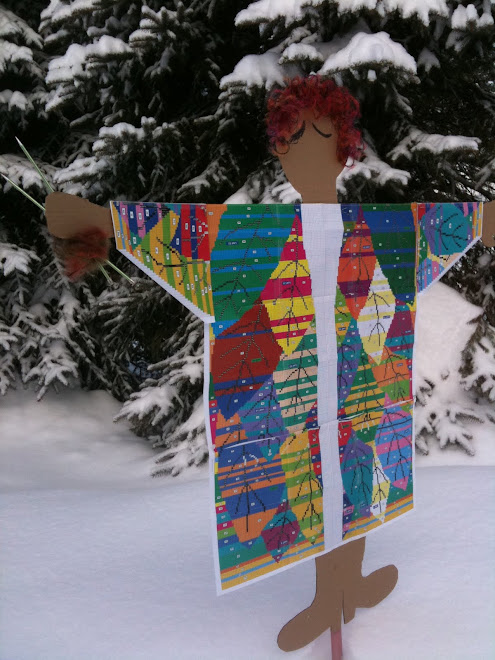
More glorious colors! You can clearly see that I'm using 2 or 3 different colors at once. KF's favorite technique with this coat is to gradually change colors (AAB for a few rows, then ABB, then ABC)--and then abruptly change to a very different colorway. For example, the first two rows of ribbing have a purple strand in with two shades of red. In Rows 3 and 4, the purple is exchanged for a brown. Then the purple's back, brown is out and in comes fuchsia. Then what looks like a complete change, but it's the purple and brown again without red.
Here's a sample of the pattern for the panels I just finished. The repetition isn't obvious at first because the letters are alphabetized. But follow a letter like F or U (both red-burgundies) or X (brown) or N (purple) and see how they appear consecutively, then disappear, then reappear in an even different combination.
(My pencilled numbers down the left are the number of rows on that line of pattern, and down the right, the number of stitches I should have by the end of that line.)
And now for something completely different (I just can't resist using that old segue from "Monty Python"): I tried my hand at needle felting for the first time yesterday, following the directions in "Little Felted Animals" by Horvath & Boutin. There's a visual joke here: you can see the gray water and gray beach, and gray, gray sky in the background, so the possibility of such a brightly colored bird in this part of the world is nearly zero! I used dyed roving purchased last year at the Maryland Sheep & Wool. My teeny black buttons were too big for the eyes; I'll try french knots of embroidery thread. Cute for a first try, but I'll keep my day job...

Wednesday, May 26, 2010

A patch a day...


Buffy, my sister has just been diagnosed with ovarian cancer, the silent killer.  She has surgery tomorrow.

Yesterday she had a colonoscopy, her first at the age of 72, to make sure that she had no colon cancer.  She has quiet a bit of health insurance along with medicare, and I just can't imagine what kind of medical care she gets when she has never had a colonoscopy. Neither had she ever had a CA 125 blood test that is a marker for tumors and costs about $60 (before insurance.)

So this has been my personal cancer awareness week. I had both a mammogram and a CA 125 blood test, and I read a lot on the internet about ovarian cancer and its genetic tendencies. Every woman should be mindful of symptoms. They are numerous and nonspecific:  abdominal fullness or bloating, urinary urgency, persistent indigestion or gas, constipation, frequent need to urinate, loss of appetite, lack of energy, low back pain among others-- easily ignored symptoms that let the cancer grow until it is third stage and deadly.

The jug coat has taken a back seat to health concerns this week, but overall, much progress has been made. The first patch has proven the value of adding a single strand of silk cloud mohair to the mix. Although the strand is hard to discern in fabric, the patch is very soft to the touch with the smallest hint of wispy mohair, so much different from the hard bath mat feel before.

The spliced together magic balls of short stands of multiple colors of yarn are working well. Over a single patch, there are usually three main changes of yarn, each new color made up of three separate strands. I keep each color in a small tub, and as I twist the colors, one under the other at the color change, I also shuffle the tubs. This keeps the yarn from tangling while the spliced yarns present no extra ends to weave in.


You can see three separate strands leading to each of the bottom tubs. I'm about to splice on that skein of blue Paternayan persian wool to the short end of one strand where the knitting pause is. At the end of the row, I lay the knitting on the tray, and give all a 180° turn.

So the art of the project is finished, and now the craft begins in earnest. I noted on your Ravelry project page that you have indicated that 30% of your Romeo & Juliet is completed. How will I ever catch up?

You know how people cross their fingers for good luck? Some pick up found lucky pennies from the ground. Me, I'm going to knit: " A patch a day keeps the doctor away."

Monday, May 24, 2010

Two Romeo & Juliet panels completed!

LuLu, you can lift a glass to toast the completion of the first two panels of the "beautiful long red coat," as it's known on the Kaffe Fassett forum at Ravelry.com. Right Front and Left Back are completed and on their stitch holders.

I pinned them together for this photo, just to see the effect. But in the coat, they won't touch one another.


I've decided: I'm going to knit a sleeve next, just for variety. I think I can knit it in the round; you know how I hate to purl. The downside is that I'll be able to knit only one sleeve at a time. But I honestly don't think I can fit both of those enormous sleeves on one circular needle, even if I don't use the full complement of stitches.

I haven't cast on yet, so I'll accept advice. Two sleeves flat, knitted simultaneously so they come out exactly the same? Or one sleeve round and round, knitting forever?

WAIT: I forgot! Those ridges on the sleeves are achieved with a mixture of knit rows and purl rows -- and the sequence is totally Kaffe's. If I knit in the round, I'll have to reverse the directions half the time, and I'll get hopelessly confused. What a pain. Phooey. Well, that decides it: flat they're going to be.

Sunday, May 23, 2010

Knitting with glass...

Buffy, "katen" has posted pictures of her Jug Coat, made in 1996, on Ravelry!  The colors are wonderful. I gave it a big red heart!

Katen says it is ankle length on her 5'3" frame. I'm only a bit taller, but I guess I will leave the coat it's original length. I've already put it through a skinny-down process, so I really hate to shorten it, too.

She said in an email that she only wears it twice a year and it makes her shoulders hurt because it is so heavy. Hers is made out of wools, and she says on her project page that it is "really heavy."

I remember that "chris4252" selected alternative fibers for her Kaffe Fassett Long Leaf Coat to reduce the weight, and she usees duplicate stitch where she can to lighten it further.

I'm still using wools (with a bit of off-white llama/silk/linen yarn for one strand in the jugs), but where I would have used two strands of 3-ply persian, I have removed a ply from one strand. And, like chris4252,  I decided to cut the weight further by using duplicate stitch to put the dark blue patterns on all the jugs.

To me, the biggest change I made (thus far) to this Jug Coat pattern is one of process. I'll knit separate patches and then combine them once the all are finished. Some have said that the coat will weaken along the seams, but others have said the seams will give the coat much added strength to carry its weight.

The advantages of knitting separate patches are many:
•  A knitting portability that the original all-in-one-piece coat did not allow
•  The ability to rearrange the patches for best color fit
•  Each patch will be able to be blocked to size accurately before seaming
•  The option to add back the deleted rows of vertical patches if I find the coat too skinny
•  The option to shorten coat at last minute by removing row of patches
•   Fewer intarsia ends to tangle -- joy!

But best of all, for me, the coat is reduced to a manageable one-patch-at-a-time process and becomes less overwhelming to contemplate. I can pick the next color of patch, the next jug I want to knit. Choices abound.

The downside? All those seams which must be made with perfection.

.................................................

By the way, I saw some Chihuly glass chandeliers at the Visitor's Center in Columbus, Indiana, the small American city known for its big name architecture.  One might have been this chandelier, now on loan by Chihuly to the City of Tacoma. I should try glass knitting needles sometime, but just the thought sets my teeth on edge.


Chihuly Chandelier at Union Station, Tacoma

Weaving with glass...

LuLu, I was waiting to check out Glorious Knits at my local library, and my eye fell on a book with a most unusual title. Now, the name Dale Chihuly is nearly a household word in my part of the country, the artist who founded the Pilchuck Glass School and whose wonderful glass creations grace hundreds of public spaces around the world. Here's the title page:


Pendletons? What do Pendleton blankets have to do with Dale Chihuly? I learned that his first experience with glass was while taking a weaving course at the University of Washington. He cut and distorted rectangles of glass to insert into this hanging (which still hangs in his mother's home).
His experience with weaving and fibers led him to native American blankets. Since he couldn't afford Navajos, he began to collect Pendleton blankets. These were commercially woven blankets of many beautiful and varied designs, made by Pendleton Woolen Mills, originally for the Cayuse and Umatilla tribes.


The blankets inspired some of his early experimentation and glass design. Those are little threads of glass:
Here's one last photo from the book. I think that's Celilo Falls in the background, a stunning set of cascades and waterfalls on the Columbia River and favorite tribal gathering and fishing place until, sadly, it was submerged by the construction of a dam in 1957. According to Wikipedia, Celilo had been settled for more than 15,000 years -- the oldest continuously inhabited community on the North American continent.

Thursday, May 20, 2010

Roméo et Juliette?

Buffy, my mom said, Always do what you like best, first; then you will always be doing what you like to do best.

So what did you do to shorten the length of your coat? Fewer stripes? Narrow the stripes? A combination?

Your coat is fabulous! I can see you wearing it to the Opera --  Roméo et Juliette?

Tuesday, May 18, 2010

To repeat, or not to repeat, that is the question...

Hi Lulu, I've been offline for a few days -- accounting got in the way of the REAL world (of knitting, color, Kaffe Fassett) .

I'm only about 4" from the top of panels #1 and #3 (right-front, and left-back). I'm knitting the two simulataneously, like two sleeves, and they're getting pretty bulky, as you might imagine. I haven't weighed them yet, but you can see that I now carry my knitting project around in a picnic basket!


It'll soon be time to decide which phase I should tackle next. I've already decided to knit the gorgeous intarsia yoke separately, starting with a provisional cast on. That way, I won't have 8 square feet of thick coat panels hanging off the needles. Then I'll simply weave it to the top of the two back panels. So I COULD start the back yoke next, even though I've knit only one of the back panels. I then could alternate knitting some intarsia with knitting easy stripes.

My worry? That this will be like knitting one sock and then getting bored and losing interest. I'm looking forward to that beautiful, beautiful yoke as the very best, most fun part of the project. So shouldn't I leave it for last? If I do the back yoke now, won't everything else be anticlimactical?

I'm really hyped about this blog and doing our coats together, but I look around at all the UFOs (unfinished objects) in my knitting corner and I fret a little. On the other hand, the intarsia will be slow, and knitting both front and back yokes at the very end might really slow me down. I've always liked frosting so I'll eat all the cake first, leaving the frosting for last...but then there's too much frosting at the end, it's too sweet, and I regret not eating it in bits, along with the cake...


I should have learned these simple life lessons years ago, but here I am. Sage advice, anyone? While you ponder that, here are my latest photos. This is the panel that's on the left side of the classic photo, and you can see that I'm now up past the very noticable turquoise stripe. And my goodness, doesn't that skirt flare!

Jug coat found

Buffy, I almost missed a comment by "kate" that was left on our May 15 "Full Retreat" post: She has knitted KF's Jug Coat! I left a message below her comment yesterday, and katen sent back a personal message on Ravelry.

Her "about me" on Ravely gives no information except to note that she has been a Raveler since 2008. She says she might post pictures of her Jug Coat, knitted "many moons ago," to Ravelry this weekend.  It will be her first project post. Exciting!


Monday, May 17, 2010

Yarn money well spent

Buffy, the WEBS tent sale was mobbed. There was an open-sided tent filled with tables of yarns in the parking lot in front of the wide open WEBS warehouse door where the cash registers were set up. Yarns were sold in unopened shipping bags of 10 balls each and the price was $20 and up for the bag. (Later I did see some Rowan cotton for $18/bag.)

Some colors in these closeout yarns disappeared quickly, but if you circled the tables, the piles were often restocked with the missing colors, and even more colors, quickly added from the warehouse by runners. And once, while I was contemplating projects for a bag of this orangy-red Valley Yarns Wildwood glittery mohair, the price was dropped from $35- to $25/bag. What to do? Buy two! The mohair will make two fabulous woven throws for Christmas presents. I bought about 10 bags of yarn in all. I should have taken a pickup truck.


My wallet took a big hit when I entered the store to buy four skeins, 25 grams each, of ShiBui Silk Cloud for the Jug Coat. The WEBS 20% discount kicked in and lowered the price to $12.50/skein. Still, fifty bucks for 100 grams of yarn was a bit much when the same dollars spent outside in the tent would have netted pounds.


Here's the ShiBui. I bought two skeins of ivory (one of which I have soaked in tea and wound off into a dozen small cakes, ready to knit), and a skein each of rust and mulberry. The dragonfly blue, also caked, was purchased from a fellow Raveler in Texas, and I've overdyed it with blue and burgundy Wiltons dye. Silk Cloud is the perfect name for this wisp of a yarn. It's making all the difference in the feel and look of the Jug Coat. Money well spent.

Saturday, May 15, 2010

Apropos of everything...

Buffy, this morning I was walking from an early coffee stop (McDonalds, which gives Seniors a break on the price) to the WEBS annual tent sale, thinking about the yarn I might find. I looked down the sidewalk and coming right at me was more car art ... well, not exactly car art, but this guy moved right along and his whirligig turned so fast he looked about to go aloft. He was from Florence, Massachusetts, the Silk City and a home of Sojourner Truth. Even though Florence is a part of Northampton, he was a few miles from home.


His license plate says it all:


As Kaffe Fassett might say, add more color. That goes for your wheelchair (Pimp my Wheelchair!) as well as your knitting projects. So when I read his plate, I did laugh, happily. What a colorful start to my day.

Friday, May 14, 2010

Juliet Coat spotted!

Buffy, a Juliet coat was spotted in California by Australian Raveler  WittyKnitter:


And I have seen that Juliet coat in the realz. It was for sale at Nepenthe at Big Sur, Kaffe’s family home, which is now cafes and a gift shop, for $3000US when I visited there ten years ago.


From my reading of that whole Ravelry thread, the '80s are coming back again. Two grandmas will be à la mode.  Now that is news.

Sunday, Sunday

Buffy, cool car art!  I found that if I click on your pictures, they will enlarge to fill the whole computer screen. I took a good look at the "girls" inside the Excessories Oddyssey car. Wow. And look at all that lipstsick and nail polish on the dashboard. And I loved the paper dolls with their cut out clothes on the front hood. Now I'm looking for my glue gun....

I see from your Ravelry notebook that you are making good progress on your coat. Take a break and go to the "Letters to Juliet" movie that opens today. Don't you just love a Romeo & Juliet story?

Here's the colorway for the background of the first patch.


The blue ball of 3-strand paternayan persion wool in the center of the circle will be the patch ground and determine it's  colorway. The ball is wound with 2 near shades of blue. The outside ring will be spiced into a magic ball of 2 strands of persion yarn, and add sparkle and the color kick. The wee bird's nest of SuiBui Silk Cloud will add luster and lightness. It will be used in all blue patches to unit them together throughout the coat.

 And I couldn't help myself. I overdyed the kid mohair/silk nest with a bit of Wilson's royal blue and burgundy dye to move it from the green to the blue side of the color wheel. Now all the mohair is mottled with blue, and so lovely. I'll buy the ivory Silk Cloud at WEBS on Saturday (WEBS big tent sale, but not for this yarn).

So Sunday I'll cast on and begin -- again!

Thursday, May 13, 2010

Apropos of nothing...

LuLu, look what I saw in the grocery store parking lot last night. Yes, those are real shoes cemented on the roof!


What you can't see very well are the faces painted on the headrests, and the wig-hair hanging down the back of the headrests, so it looks for all the world as though there are people in the van. They looked so real, in the dark, I was afraid at first to go near to snap these photos!


Isn't it wonderful?!

Knit small to knit large

Buffy, I slept on the idea. The Jug Coat is made out of even-sized rectangles and only the two center neck pieces are "out of square," with shaped edges that fit the neck. It could easily be made block by block and seamed together after all were finished.

The upside to making many blocks and seaming them together like a quilt would be many:  The project,  would be very portable and could be picked up at any time for a few short rows.  Intarsia yarn strands could be longer for they would not make such tangles, and there would be fewer ends to knit in. Friends could knit a bit on their own pieces! And did I mention portability???

The seaming might make the coat less supple, but it's as thick as a bath mat as it is. Removing the extra hidden ends of the shorter strands might be an even trade off for the many seams.

The only downside is the seaming itself. It must be perfect!  But there's proof that this can be accomplished. Take a long look at AmyB's Double Wedding Ring Quilt (572 hearts!) There is an even number of stitches on both the short and long side of each patch. Perhaps I could do a three-needle bind off on the tops and bottoms of the patch, and a three-needle bind off on the side edges after carefully picking up stitches.

I'm still waiting for the Silk Cloud to arrive, so I can think about this some more. What do you think, Buffy?

Wednesday, May 12, 2010

Many hands, light work

Buffy, my coat is 120 stitches across the back edge, another 120 stitches across the two fronts, and the 240 stitch total equals a five foot circumference. I notice that the two parts you have on the needles now have 130 stitches, which might make your Juliet more than 5 feet around the bottom edge. Perhaps, before you go further, you should make and tape together a paper pattern, then try it on to check the fit. There's a small full-length color picture of the back of Juliet Coat in KF's first book, Glorious Knits, and it quite full--and the coat almost touches the ground.  It's hard to know if the coat your a knitting has been modified from the earlier book, or if the photographer tucked a lot of fullness to the rear in the Glorious Colors photo. Either way, it's a stunner!


Your idea of seaming the shoulders of my Jug Coat is a good one. That would allow me to have a visitor (you?) knit on one side of the coat and I the other as we chatted away. You could practice knitting from yarn "birds' nests."

If fact, the easiest way to handle the Jug Coat would be to knit each patch indiviually, and then seam the blocks together before adding the finishing touches!  Many friends, many hands, light work!

More and more stripes

I've little to report, LuLu, only that the coat is growing, stripe by stripe. And we're picking up a bit of speed here as the two pieces (right-front and left-back) grow narrower. That's a benefit you won't be able to experience, sadly, until you've finished the sleeves and are flying down the front. Have you considered stopping at the shoulder-line? You could certainly justify it because the coat will be so heavy, it could well use the stablizing strength of a 3-needle seam at the shoulder.I'm down from 88 stitches on each piece to 65. And I'm feeling more and more anguish over the need to eliminate those 22 rows. Is it better to skip entire stripes, or make the stripes narrower? it seems to me that the coat will be more flattering if the stripes (generally) are wider at the bottom but become narrower up toward the yoke (and my body's mid-section, ahem). That's why I stuck with the full width, per the pattern, of the grapey section at the bottom of the coat. But I may have to go back and sacrifice some of that if I can't be more disciplined (feels draconian) about eliminating rows to make the coat short enough.

Tuesday, May 11, 2010

Turn, turn, turn

Buffy, as your red Juliet grows longer, you could knit from the left side of the couch, and then when you change rows, switch your seat to the right side of the couch without turning the yarn or the coat on the needles.


You have given me an idea. As my one piece coat grows, I can leave it in the tub. I'll put a second chair on the opposite side and just switch seats at the end of each row instead of trying to turn over the coat.  Maybe I could just put the tub on a wee lazy susan and turn, turn, turn. That would work.


UPDATE:  Or maybe not. Here's a quote from a PM that I just received from Ravelry friend Chris4252 who is knitting KF's Long Leaf Coat:  


I have tried changing my sitting position on my sofa where I am set up and I just didn’t feel right sitting the other way round!!! Plus I had to move my set-up with my graph/pattern and it all got too annoying. I have also tried moving from my sofa to a chair for the return row and didn’t get on with that either - what a fuss-pot I must be - hope you have better luck with the moves. I continue to check and detangle each ice-cream box pair of yarns after each colour change across the row - there is one move needed per colour change - but I am reconciled to each row taking a long time.

She also said, "Amazing colours in Buffy's coat!" I concur!

Full retreat

Buffy, brilliant!  I had to read your post twice to realize that you were knitting from both ends of each ball because you have two coat sections with identical striping on the needles at once. I can see that your "tangle" problems would be annoying without your clever solution.


By the way, the white-and-blue-china jugs and vases are knitted by stranding the blues and whites back and forth. It's the patches that are knitted intarsia with each other and with the jugs. 


I actually don't have quiet the tangle problem you might suppose. Kaffe Fassett suggests using short pieces of yarn: just pull the end that you are using at the moment out of the bird's nest of yarns that instantly accumulates. That works well as long as you knit in all those loose end as you the new pieces of yarn. Short pieces of yarn also let you control the marbling in the jugs and across the patches -- the colors more the merrier. 


On Mother's Day I found these small balls of Kool-Aid dyed yarn left from a sweater made for our shared grandson. I'll knit them into the coat. They are in a  colander that my mom used weekly to make cottage cheese when I was a kid--maybe it was her mother's or grandmother's. The colander tops a wooden waste basket that will be handy for all those snips of yarn.


Five quick rows of knitting were enough to conclude that the coat fabric looked somewhat like a heavy bath mat, and hard. Soldier on! No, BLOW RETREAT.


I frogged the coat. What to do? As KF would also say, just add more yarn!  I checked WEBS and found Shibui Silk Cloud, a glowing core of silk surrouded by a whisp of mohair. Laceweight, there's 330 yards per 25 grams. It will give both very subtle glow and a touch of softening haze to the Jug Coat. The patch colors all fall into three colorways, blues, browns and reds, so along with ivory, I'll only need four colors of Silk Cloud. I'll add a strand of Silk Cloud to each patch nearest the colorway, and a strand of ivory to the china. The dark blue of the china will stand alone.  It does add another 12 breaks of yarn across each line of row of four patches, 16 across the rows with half-patches, and for the sleeve rows ....


So the Jug Coat will no longer be made totally from stash. Bummer. Initially I'll purchase just 25 grams each of rust, mulberry, dragonfly and ivory.  WEBS has the dragonfly blue on backorder, but I was lucky to find a Raveler in Texas who wanted to destash a skein. (I gave her "Just Enough Ruffles" a red heart!) All the colors should be in hand by the weekend. And then a new start. 

Monday, May 10, 2010

3 balls, 6 strands, chaos

LuLu, I'm so proud of myself: my organization problem (itty-bitty next to yours) has been how to keep the lines clear when I'm knitting 2 pieces with 3 strands each, and trying to do it off 3 balls of yarn. And here's what I've learned:

It's counterintuitive, but set the balls on the sofa beside you with the CENTER-pulls DOWN. That way, the strands that are unwinding from the outside, going round and round, don't wrap around the center-pull strand.


Next to the logistics problems you've been solving, this is really trival. But I can't tell you how excited I was to figure this out, after trying to unravel some gosh-awful messes. Two balls/4 strands isn't so bad, but most rows of the R&J coat are knitted with 3 strands of yarn, and the messes grow geometrically. (Yes, of course I could use 6 balls of yarn. But this solution wins because, as designers and mathematicians know, simpler is always more elegant.)

Frogging...

LuLu, you are quite amazing. You had so much planning to do -- but now your fun begins.

Where was my brain when I suggested knitting in the round? Intarsia in the round is next to impossible. I did read recently how some ethnic knitters have done intarsia in socks: they knit across the motif with color #1, knitting the pattern stitches and slipping the others, then slip all the stitches back to the original needle and knit the remaining stitches of the motif with color #2, and slipping the color #1 stitches. I can just imagine you, chained to your tubful of coat, knitting and slipping across each jug twice and cursing the day you listened to my bean-brained ideas...

And speaking of, or asking, where was my brain...I discovered I'd done some decreasing on the edge that's supposed to be straight... Sigh. Had to frog down to the green/bronze. But I'm back to where I was, and all is now proceeding a-pace.


Saturday, May 8, 2010

It takes a knitting station

Buffy, the Jug Coat is on the needles!
See the yarn on the needles resting on the seat of the chair!  I've started! I'm a quarter of the way through line one!


After the provisional cast on, it was time for a break. Here's the problem:  There are so many color changes that happen so fast (less than fifteen stitches at the most between jugs) that I have to have everything around me. So I set up a knitting station by the coat cupboard.


There's not much natural daylight so I added the color-correction lamp that I usually use only at night. Then I turned the lid over in the copper boiler so that it could be used as a table, clipped the first three rows of patches (with the deleted patches crossed out) to the door with a magnet, and found some pots to hold the colorways for the first four patches. The boiler will hold the Jug Coat as it grows larger and larger.


I've punched holes in index cards numbered one through four which will hold a sample of each color as I knit these first four patches. The ground colors for the next row of patches have been bagged and tagged. I will select the china grounds and blue outlines when I get to line five and toss them into the respective color-keeping pots, too. Each jug has it's own unique color scheme, although all are extremely similar. I've got more than 10 light creams and 10 or so light pinks and blues for the jugs which can be mixed in many combinations. I suppose I have a dozen or more dark blues for the jug patterns. 


The art part of this coat is to pick the right color combinations as colors constantly change. KF says to try for a marbled look, but his patches look a bit like speckled granite to me. I'm guessing you can't go wrong--it's art! Surrounded by all the yarns, choosing the next one from many choices can be a slow process.  That's where one could benefit by using the "magic balls" we discussed. They would cut down on time spent on yarn selection but you would have to be comfortable with potluck choices.
  
It's time to move in a TV, music and books on tape--well, books and music on iPhone. (And forgive all the fuzzy photos I'm posting. All have been taken with my iPhone.)

Working on the chain gang

Buffy, I know you're a fan of steeking, but I never have, so it's always a scarry thought to me. And although I hear jungle rumors that intarsia can be done in the round, I'll believe it only when I see it. (But I can imagine a four-foot-wide lazy susan with all the yarns in the middle and knitting round and round while turning the table. Now that would be fun!)

You can imagine the complex juggling trick knitting a flat piece requires. After thinking about knitting back and forth on a five-foot piece of fabric with eight squares times four yarn ends per square, times each yarn end made up of two or three different yarns--I need a calculator to go on.  So knitting the front and back together is out. I'll follow KF's directions to knit from the back edge up and over the shoulders and down to the front edges.

The unwieldiness of the Jug Coat is quiet apparent. It might never leave home until it can be worn out the door. I used to think that this was my "bucket project," but now I see that the bucket has changed to a tub, and the tubful of coat and I will be chained to the house until done, done, done.

Friday, May 7, 2010

Can't be too rich or too thin...

Wallis Simpson could say that, being both....

LuLu, I think you're making an excellent modification by eliminating a vertical row--one you'll not regret. Besides, you've just reduced the number of months to knit your coat by about 20%!

I've been thinking about your pockets. A lot of the models in Glorious Color have their hands in their pockets, maybe to hold in the sides of those great wide coats. When you pose for the camera in your museum-piece coat and your super-glam 4-inch-heel boots, will you wish you, too, had pockets? Will you need them for the hankies your mother insisted you carry, one for blow, one for show? Other than for glamorous poses, I'll bet you could skip the pockets and no one would know or care. And there goes another 10% of the time your project will take
.
I'd sure think about knitting in the round and steeking. Wool is perfect for that.

KF's camaïeu enlightenment

Buffy, this might be one answer to the camaïeu puzzle. Kaffe Fassett's instructions for Persian Poppy patterns (Glorious Knits) says to make "magic ball" colorways, where you tie short random lengths of yarn together in a not-so-random fashion:

     The only rule I use is to go from one colour to the nearest value to it, working, say, from darkest grey to medium to light, and on to sky blue or whatever. Sometimes you might like great jumps in contrast so experiment with many different colors and textures.


The Jug Coat background squares will be constructed (somewhat) this way. I am pretty sure that the squares will look much better from a distance where the eye can blend the colors. I might find them a little disconserting from my close-up viewpoint. But here KF has encouraging words:

     Even the most brilliant and professional garments can look like 'nothing on earth' while they are growing, and many would-be designers crumble at the half-way stage...Colours can be too bright or too dull...It can all be very harrowing! So we all need the courage to soldier on....


I'll hold that thought as I cast on.


Coat on a diet

Buffy, here's the original proportions of KF pattern along with the redrawn schematic.  Following your suggestion, I've put the Jug Coat on a diet with the removal of a vertical row of squares in both the front and the back, bringing the coat down to a 60-inch circumference at the bottom edge. This will "shorten" the sleeves by 3-1/4 inches on each side, but schematically they will maintain the same balance. This should be perfect for my short arms, and if not, I could lengthen the cuffs a bit. The coat body at 30-inches across should still have plenty of roomy swing.


           I'm tempted to join the back to the front on the circular needles and knit in one piece until the sleeves. But this would make the side pockets a problem. They would have to be steeked, which would disturb the design. Perhaps I can add a lumpy three stitches where the pocket will be and then carefully open a steek, turn the extra to the inside, and block out any wrinkles. In my prior life, I've done neither steeks nor pockets. What's your opinion? Go pocketless?

Or better, I could knit in one piece until the pockets, knit the front and back separately for the length of the pockets, and then rejoin and knit in one piece up to the sleeves.  

To keep all the blue-and-white china designs, I'll need to drop some duplicate designs off the back squares and replace them with the vases dropped from the front. I'll get to look different coming and going!

Thursday, May 6, 2010

Maryland Sheep & Wool Festival

LuLu, it was great to see you at the MS&W. Temperature AND humidity in the 90s, but it didn't seem to slow us down--there was simply too much to see and do: 1000 sheep, 250 vendors, and who knows how many people. Maybe 25,000 on Saturday? There was a wonderful feeling of camaraderie; fiber folks are just fine, friendly people.

Last year, I bought 5 pounds of the most GORGEOUS Corriedale fleece. The sheep had been blanketed all year so it was very, very clean. It was a challenge, squishing it down in a plastic bag, to a size I could take aboard the plane. Even after an initial washing, the wool is still loaded with lanolin. It went from a glowing golden cream to a glowing golden white. I can hardly bear to spin it.

This year we found an equally wonderful black Romney fleece. Clean, wavy, nice long staple. Here I am, crouching in the sparse shade of a building -- it was so incredibly hot! By comparison with the Corriedale, the Romney has much less lanolin. But it's light and springy, and will also be a joy to spin. Thank you for splitting the fleece with me since I can't possibly spin all that wool AND knit along on the R&J coat!


I'm no authority on wool and sheep, but I'd guess those red/brown tips mean this sheep is middle-aged, since black sheep wool tends to lighten and gray as the sheep ages. Just like grandmas.

To cuff or not to cuff...

... Buffy, that is the question.

It has been suggested by several Ravelers that I do a provisional cast on and wait until the Jug Coat is completed before I decide on the edge finish. Good answer!  Let's me put off that decision for now.

Dropping a vertical row of squares (1/2 square on the front and 1/2 square on the back) would unbalance the coat -- every other row would have one wrapping square on one side but not the other. Dropping a two vertical rows of squares (one on the front side and one on the back) could be a solution for a very wearable coat still with a balanced look. If you squint at the finished image and imagine it without the pleated material under the left arm and the extra material kicked out by the model's right foot, it looks quite modern. It would be a pound or more lighter and, yes, very wearable. And much less knitting ( I might be able to catch up to you!)

Maybe the real secret to this Jug Coat is great boots and a curly blonde haircut.

Cuff at the bottom?

LuLu, you asked readers' opinions about putting the cuff at the bottom of your wonderful but huge coat (as called for in the original pattern)-- but you didn't ask mine. No way!! Don't do it!! If I can eliminate random rows from the R&J coat to keep it from dragging in the mud, you surely can skip that ridiculous cuff. And if it were my choice, I'd also eliminate a vertical row of squares, too. Then the coat would be only 60" around instead of 75", still enormous by any standard.
Why not make the coat wearable after all this work?

Measure twice, cut once

Buffy, I see your Romeo & Juliet Coat is now on Ravelry at GrandmaBuffy's Juliet Coat. And GrandmaLuLu is your Ravelry friend!

I loved seeing the beginnings of your project at the MDSWF Sunday. Fantastic colorway. And I can see why you make the wool fest an annual event.  How did you talk me into sharing half a bag of soft black fleece?  It added a certain farm smell to the drive home, somewhat dissimilar to new mown hay, if you get my drift....

Did you meet Miss Babs? She handed out business cards with a mini-skein of her hand-dyed sock yarn attached. I was lucky to get a rosy mauve colorway sample, and this little skein of yarn is going into the Jug Coat as a reminder of a happy, hot afternoon in Maryland.


The Jug Coat is still in the planning stages. Kaffe Fassett's directions:  The main objective is soft richness. Each square is gently distinct in its toning, without being too contrasting. I drew a schematic of layout of the squares (actually rectangles), and used a midrange of reds and blues to fill in colors. I tried to avoid a checkerboard look while making sure that there was enough contrast, but not too much, with the limited color palette available in the drawing program.


The restrictions are thus:  Choose background colour for each patch as desired, but be sure to match front half patches at side seams. Use contrasting colours for all other patches at side seams.

Since the Jug Coat is knitted in one piece from back bottom edge, up and over the shoulders and then down to front bottom edge, the trick will be to remember to reverse the half squares on the fronts so that they match the half squares on the back and make a unified whole: enough yarn must be saved after the first back half squares for use on the front of the coat so that the squares match up the seam.  The same rule applies to the squares that combine and wrap under the arms in the "half-T" shapes. The center shoulder square must be changed on the front side, although the rest of the shoulder squares can be reversed. That should do it.

I think I will presort my colors into groups to make sure the color is well balanced throughout the coat. About 18 colorways are needed for the back squares. That will give me a check on whether my yarn colors support my schematic arrangement before the cast on.

By the way, the New Hampshire Sheep and Wool Festival is this weekend. There's a day long demo of the care and cleaning of a fleece, with audience participation. It will be worth the drive for me to find out just what to do next with this big bundle of brown/black/grey curly wool you enticed me to cart home from Maryland.

Buffy, I see you did swatch before starting.

Casting on

Lulu, while you've been planning, I've cast on and have been knitting up a storm. No complex decisions for me, just follow the pattern. Well...with a few exceptions:


1. To get horizontal gauge, I'm using #10, not 10.5. No big deal. #10 needles!!! This is going to go FAST!

2. Then, I'm way shorter than Kaffe's models, and I can't have this masterpiece dragging on the ground. Should I toss out certain stripes? No, I'll make occasional wide stripes just a little narrower. It's sad to not follow the master's instructions to the letter, but can't be helped. KF's gauge yields a 53" long coat. I want mine to be 46". Figure I need to eliminate 22 rows.

3. Those straight red strips at the bottom, with the ridge? That'll be the hem. And do you notice that there's more length on the right than on the left? That's in the pattern: Short rows to create a curved hem. Wider part will be the center (front and back).

MISMATCHED STRIPES

Another big decision: Should I follow KF and have mismatched stripes on the right and left? Oh dear, this is hard for an accountant. We like things tidy and reconciled, orderly, matched. And if I matched up the stripes, I could pick one stripe sequence and knit the entire body of the coat in the round. I hate to purl; I could knit in the round, and then steek.

Ahhh-- but here's what Kaffe Fassett says: Zoë [Hunt, his collaborator] and I did do one version of the big-sleeved coat with an uninterrupted striped back, but I felt that the wide stripe running horizontally without a break was not as flattering as the broken, unmatched one in the pattern given here. More flattering! That's for me!

TWO IN ONE BLOW

It turns out that the stripe sequence for the Left Front and Right Back are the same. And for the other two sections (RF and LB), you simply REVERSE the stripe sequence! How simple is that? So I'm knitting the LF and RB at the same time.

And how do you like these knock-your-socks-off colors?! Aren't they wonderful?

Camaïeu

LuLu, I have a wonderful new word for you: Camaïeu -- from Wikipedia, it's "a technique that employs two or three tints of a single color, other than gray, to creat a monochromatic image with out regard to local or realistic color.... This French word once was synonymous with cameo..." I think this perfectly describes your challenge: the dozens of shades you'll be using to produce an overall effect of four simple colors, background gray-but-not-gray, red, cream and blue. Now if only someone would tell me how to pronounce it...
 
Share